
Rice Cooker Repair with 3D-Printed Knob
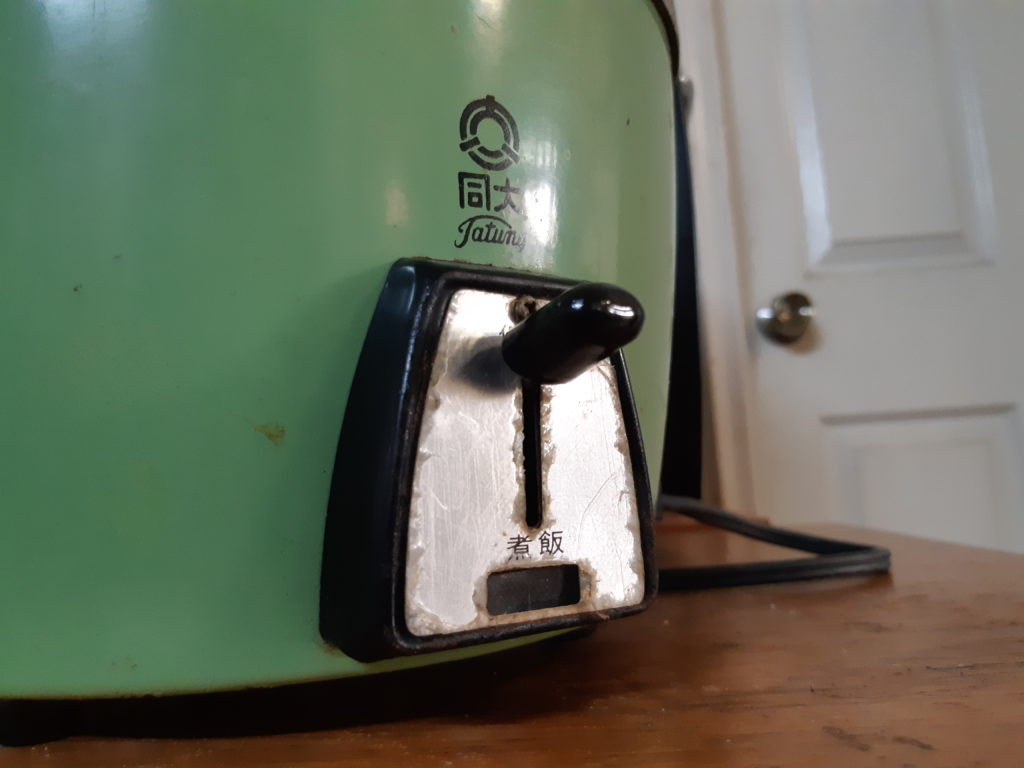
The on-off switch on our 30+ year-old Tatung rice cooker (大同電子鍋) has been missing a knob like forever. Besides being unsightly, it’s a bit tough on your fingers whenever you press the lever. Tatung rice cookers are built like tanks and this one probably has a few good decades left in it. So, to restore its ease of use, I set about making a new knob using 3D printing!
Clean Up
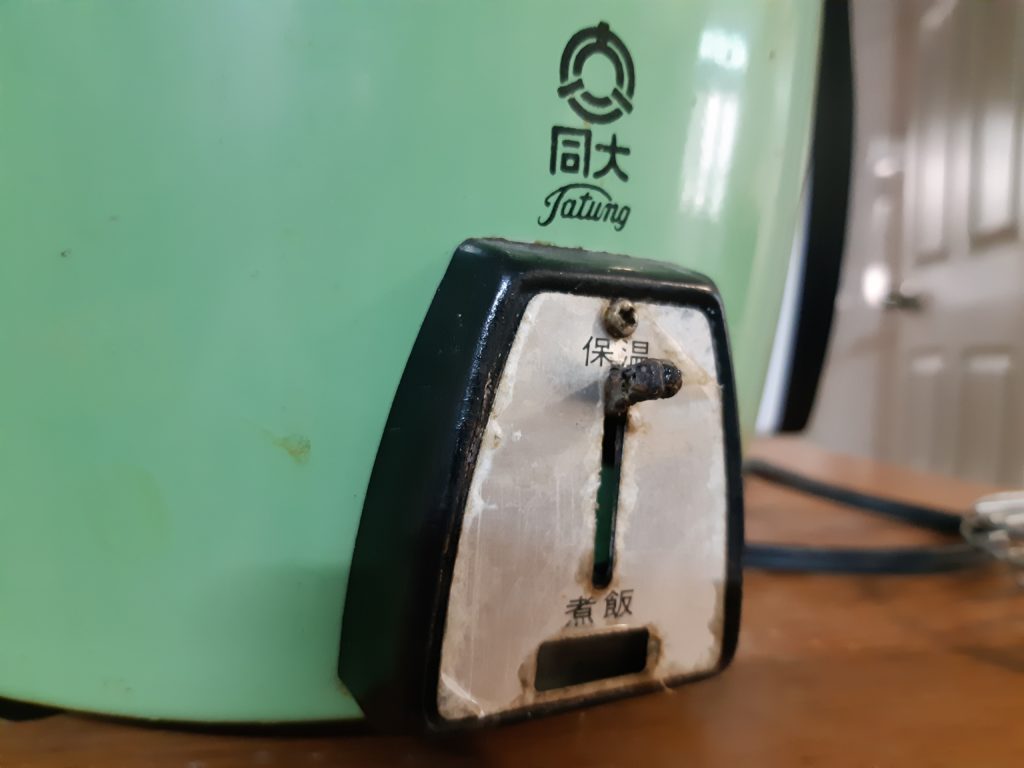
First thing to do was to clean up the lever. This thing was grimy from years of use. Some kitchen degreaser cleaned everything up nicely.

Plan and Design 3D Print Solution
Next, got some rough measurements of the lever. My plan was to recreate the missing knob and just stick it on the end of the lever with some glue.
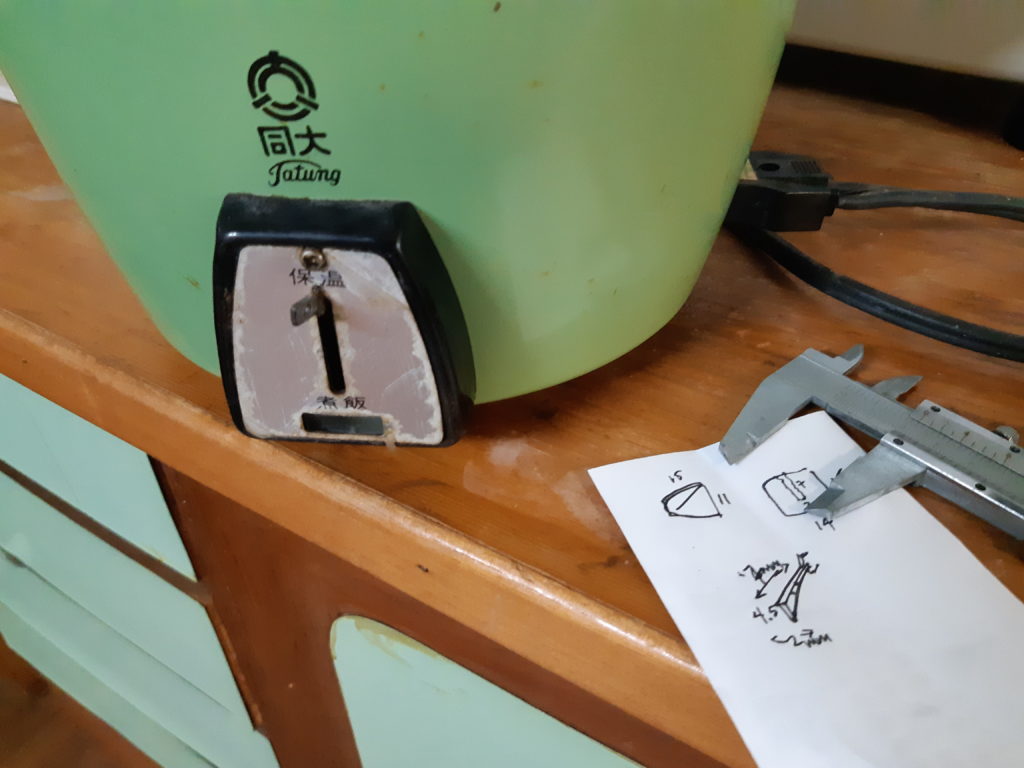
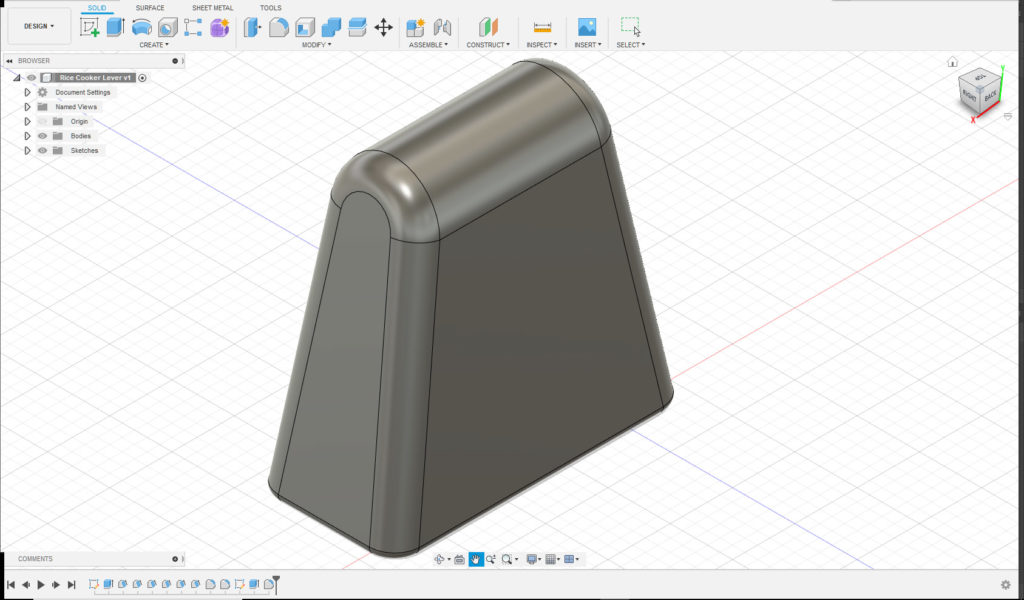
I designed a knob in Fusion 360, trying to mimic the shape of the knob based on online pictures of the knob.
Test Print and Re-iterate
It took about 30 minutes to print out the part. The size and feel, though, wasn’t what I wanted. So, back to the mouse and monitor.

After a few more test prints and design revisions, I refined the look and size to something that felt right.
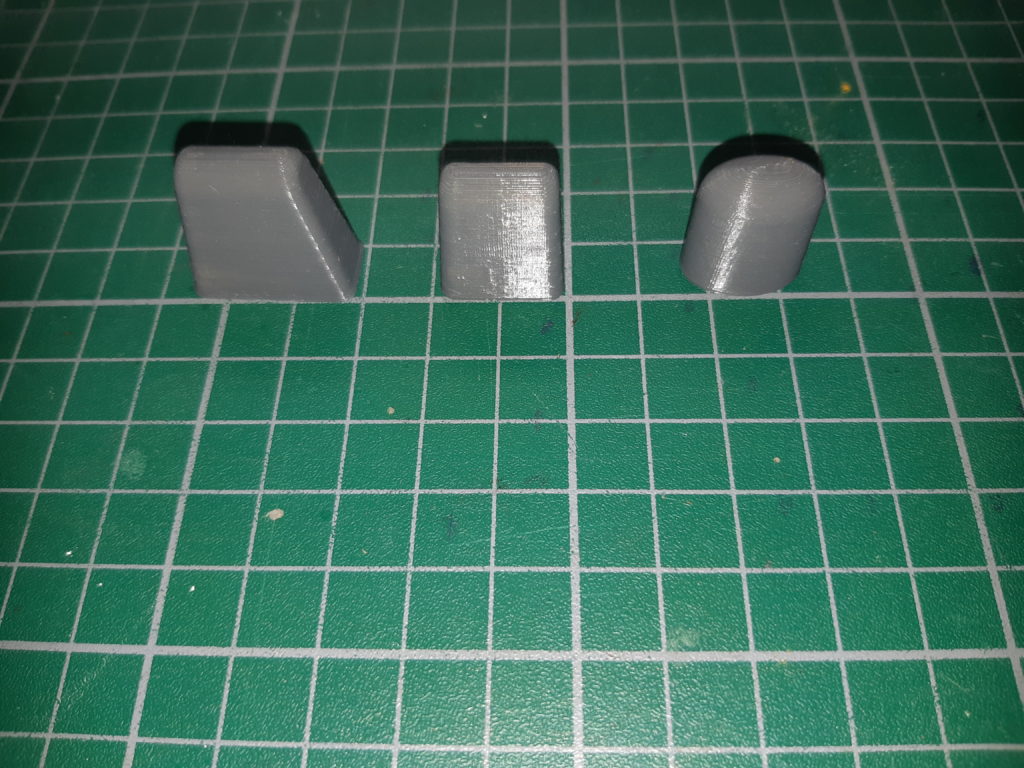
The final knob is the one on the right.
Final Touches
After test fitting on the lever to confirm function and feel, I painted the knob with black nail polish to give it a smooth, shiny feel and look like the original knob.

After drying overnight, a little epoxy resin was used to secure the knob in place.
From start to finish, it took just a few hours of work. Now, this rice cooker is good for another 30 years!
Download the 3D Files!
If you want to make this part, download the STL file on Thingiverse!