Homemade Barometer
Another quirky idea popped into my head recently. I had a glass barometer swan when I was young and thought it would be cool to make a barometer based on the same principles of this simple device.

A water barometer, or thunder glass, was sometimes formed in the shape of a swan, thus the name swan barometer. The basic principle behind the device was that a body of air trapped inside a device sealed by water that was open to the atmosphere through a column would expand or contract and thereby push or suck in the water column according to the difference in pressure between the air inside and outside of the device.

High pressure outside the device would force the column of water down, indicating a relative high-pressure system and thus better weather. A rise in the water column would indicate that the pressure outside the device was decreasing, indicating a low pressure system and incliment weather was closing in.

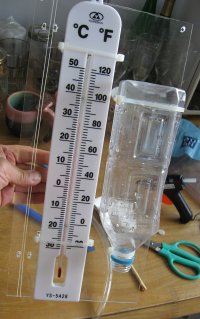
Well, going with my usual goal of using only the materials I had on hand, I rounded up the following bits: a clear plastic mineral water bottle; a rectangular piece of acrylic plastic; a clear plastic tube; and some plastic fastener strips. The one thing that I did go out and buy was a cheap weather thermometer for about US$3. The plastic bottle would contain the sealed body of air while the clear plastic tube would hold the column of water with which to gauge the change in pressure. The whole device would be mounted on the acrylic board.

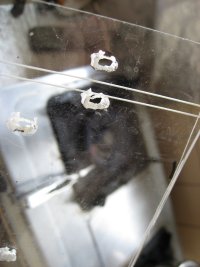
The first thing I did was roughly mark out on the piece of acrylic board where everything was to to go. Then I punched holes in the acrylic board with a hot nail where all the plastic fastener strips would hold all the pieces in place.
Then, again using a hot nail, I made a hole in the mineral water cap and secured the clear plastic tube to the cap with my trusty hot glue gun. A hot glue gun is a very handy device to have. That, and a hot nail.

With the basic parts constructed, I secured them all to the acrylic board. Next I filled the water bottle with a colored fluid so that it would be easy to see the variation in the fluid level. I had some blue-colored cleaning fluid on hand so I used that. I filled the water bottle to a little more than half full and then secured the cap.
Next, I attached a cheap thermometer to the entire contraption. From my previous experiece, a water barometer like this is subject not just to changes in air pressure but also to changes in temperature. In fact, expansion or contraction of the air trapped in the water bottle due to temperature fluctuations is often greater than that caused by changes in air pressure, so I wanted something to help keep track of the temperture.

Lastly, I attached some wire with which to hang the device and then turned the entire contraption into its proper orientation. I had to adjust the pressure of the air inside the water bottle by blowing air through the tube to adjust the height of the water column to be within the straight portion of the tube.

The day I placed this water barometer outside, a typhoon was fast approaching Taiwan and sure enough, I could see a very obvious change in the level of the water. The water level in the tube went up considerably as the typhoon approached while the temperature remained constant. Pretty cool.

